
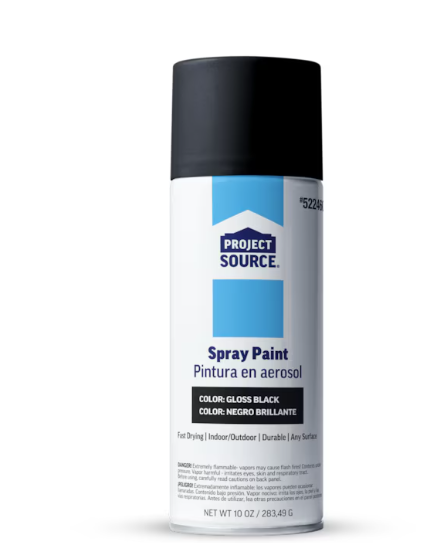
Project Source Gloss BLACK/GLOSS Spray paint ( NET WT. 10-oz )
- Fast drying Interior and exterior spray paint for use on wood, metal, plastic, ceramic, wicker, drywall, concrete and more.
- Larger size nozzle protects against paint on your finger tip
- Spray nozzle controls the flow of paint for better control and less drips and runs.
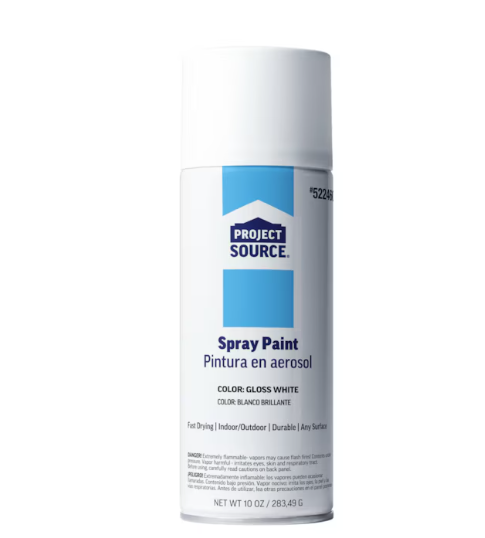
Project Source Gloss WHITE/GLOSS Spray paint ( NET WT. 10-oz )
- Fast drying Interior and exterior spray paint for use on wood, metal, plastic, ceramic, wicker, drywall, concrete and more.
- Larger size nozzle protects against paint on your finger tip
- Spray nozzle controls the flow of paint for better control and less drips and runs.
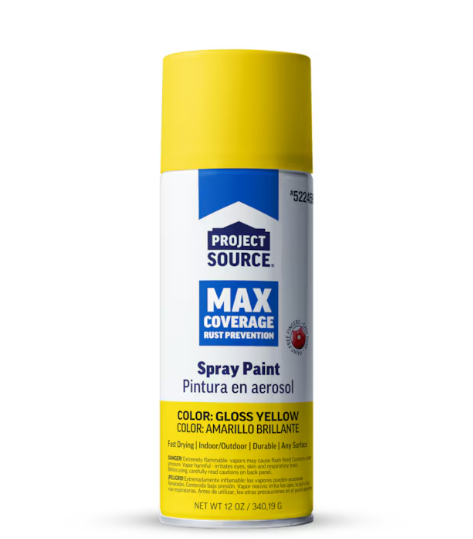
Project Source Gloss YELLOW/GLOSS Spray paint ( NET WT. 12-oz )
- Fast drying Interior and exterior spray paint for use on wood, metal, plastic, ceramic, wicker, drywall, concrete and more.
- Larger size nozzle protects against paint on your finger tip
- Spray nozzle controls the flow of paint for better control and less drips and runs.
Unleashing Your Creative Potential One Spray at a Time
The world of DIY home improvement is vast and colorful—quite literally when it comes to spray paint. Among the many options available to creative enthusiasts and practical renovators alike, Project Source spray paint stands out as a versatile, affordable solution for transforming virtually any surface with a fresh coat of color. Whether you’re upcycling old furniture, giving your outdoor fixtures a new lease on life, or embarking on a craft project, the right spray paint can make all the difference.
As someone who has spent countless weekends bringing new life to yard sale finds and breathing fresh energy into tired spaces, I’ve developed a deep appreciation for quality spray paint that doesn’t break the bank. Project Source, a brand that flies somewhat under the radar compared to some of its flashier competitors, deserves serious consideration for your next project. But what exactly makes it worth your attention? Let’s dive into everything you need to know about this paint option that might just become your new go-to.
What Exactly Is Project Source Spray Paint?
Before we get into the nitty-gritty of application techniques and color selection, let’s address the fundamentals. Project Source is a house brand that offers a range of home improvement products, including a comprehensive line of spray paints. Designed with the DIY enthusiast in mind, these aerosol paints provide an accessible entry point for both novice painters and experienced renovators.
The beauty of Project Source spray paint lies in its simplicity and reliability. It’s not trying to be the most premium option on the market—instead, it focuses on delivering consistent results at a price point that makes experimentation and large-scale projects feasible for the average homeowner. The formulation strikes a balance between quality and affordability that’s increasingly rare in today’s market.
I first discovered Project Source when working on a budget bedroom makeover for my niece. The laminate furniture needed refreshing, but I wasn’t prepared to invest in high-end designer paint for what might have been a temporary solution. The results were so impressive that Project Source quickly became my recommendation for friends embarking on their own DIY adventures.
The Versatility Factor: What Can You Paint?
One of the most frequently asked questions about any spray paint is what surfaces it can successfully transform. With Project Source, the answer is refreshingly broad. The formula adheres well to multiple materials, making it a true multi-surface solution for diverse projects around the home.
Metal Surfaces
From patio furniture to cabinet hardware, metal items are prime candidates for spray paint rejuvenation. Project Source spray paint adheres particularly well to metal surfaces, creating a smooth, even finish that resists chipping. The paint flows easily over metal contours, reaching into crevices that might be challenging with a brush.
I’ve personally used it to transform an old brass lamp base into a sleek matte black statement piece and to give new life to tired garden chairs that had seen better days. The key to success with metal surfaces is proper preparation—more on that later.
Wooden Wonders
Wood presents its own unique set of challenges for paint adhesion, but Project Source rises to the occasion. Whether you’re working with raw wood, previously painted surfaces, or even certain types of engineered wood products, this spray paint can deliver exceptional results.
One particular project that stands out in my memory involved a set of wooden picture frames that had yellowed with age. Two light coats of Project Source in a crisp white completely transformed them, creating a cohesive gallery wall that looked custom-made rather than cobbled together from thrift store finds.
Plastic Possibilities
Perhaps most impressively, Project Source spray paint performs admirably on plastic surfaces—an area where many paints struggle. From plastic planters to children’s furniture, the paint adheres well without cracking or peeling, provided the surface is properly prepared.
Last summer, I rescued a set of faded plastic Adirondack chairs from the neighbor’s curb. After a thorough cleaning and a couple of coats of Project Source in a vibrant teal, they became the most complimented feature of my backyard setup. The paint has weathered a full year of sun, rain, and use without significant deterioration.
Other Compatible Surfaces
Beyond the big three (metal, wood, and plastic), Project Source spray paint can also be used on:
- Glass (though proper preparation is crucial)
- Ceramic
- Wicker
- Some fabric applications
- Concrete and masonry
- Drywall and interior walls for small areas
- Paper and cardboard for craft projects
This versatility makes it an excellent option to keep on hand for impromptu projects and quick fixes around the home.
Finding Project Source: Where to Buy
If you’re convinced that Project Source spray paint might be worth trying, your next question is likely where to find it. Unlike some specialty paint brands that require a trip to dedicated paint stores, Project Source products are accessible through major home improvement retailers.
Lowe’s serves as the primary retailer for Project Source products, including their spray paint line. This exclusivity is because Project Source functions as one of Lowe’s house brands, developed to provide their customers with reliable options at competitive price points.
You can purchase Project Source spray paint in Lowe’s physical stores nationwide, or through their online platform if you prefer the convenience of home delivery. The online option also allows you to browse the full color range and check availability before making a trip to the store.
During my most recent visit, I found the spray paint section well-stocked with Project Source options, typically placed alongside other spray paint brands for easy comparison. Store associates can generally direct you to the correct aisle if you have trouble locating them.
The Color Spectrum: Available Options
When it comes to color selection, Project Source offers a respectable range without overwhelming consumers with too many nearly-identical shades. Their color palette includes:
Neutrals and Basics
- Flat White
- Gloss White
- Flat Black
- Gloss Black
- Various shades of gray
- Beige and tan options
Bold Colors
- Primary colors (red, blue, yellow)
- Secondary colors (green, orange, purple)
- Several shades of blue ranging from navy to sky
- Earth tones including terracotta and forest green
Specialty Finishes
- Metallic options (gold, silver, bronze, copper)
- Hammered metal effect
- Textured finishes
- Clear coats in various sheens
While the selection isn’t as extensive as some premium brands that might offer dozens of shades of a single color, the Project Source lineup covers the bases for most home DIY projects. The colors tend to be true to their cap representation, which helps eliminate unwelcome surprises when the paint dries.
I’ve found that their white spray paint is particularly reliable—achieving good coverage without the yellowish undertone that plagues some budget options. Their black finish is similarly impressive, delivering a rich, deep tone rather than the washed-out appearance that can occur with lower-quality formulations.
Price Point: Value for Money
In today’s economy, price considerations factor heavily into most purchasing decisions. One of Project Source spray paint’s most compelling attributes is its affordability, especially when compared to premium competitors.
At the time of writing, a standard 12oz can of Project Source spray paint typically retails between $3.97 and $5.98, depending on the specific finish and formula. Specialty finishes like metallics or textured effects may command a slight premium, but still remain under the $7 mark in most cases.
This pricing structure positions Project Source as an economical option that doesn’t sacrifice too much in terms of quality. For comparison, premium spray paint brands often retail between $7 and $12 per can for similar sizes, making Project Source roughly half the cost in many instances.
The value proposition becomes even more apparent when tackling larger projects. When I repainted six dining chairs last year, the cost difference between using Project Source versus a premium brand amounted to nearly $30—enough savings to add a complementary table runner and new candle holders to complete the refreshed dining area.
Durability: Will It Last?
Affordability means little if the finish deteriorates quickly, requiring frequent touch-ups or complete reapplication. Thankfully, Project Source spray paint delivers respectable durability for its price point.
For interior applications with minimal handling, Project Source finishes can last for years without significant deterioration. My bathroom cabinet hardware, sprayed three years ago with their metallic bronze, still looks fresh despite daily use.
Exterior applications naturally face more challenging conditions. In my experience, Project Source holds up reasonably well outdoors, particularly if protected from extreme weather. My garden bench, which sits under a partial overhang, has maintained its Project Source finish for two seasons with only minor fading at the edges most exposed to sunlight.
The paint’s resistance to scratching and chipping varies somewhat by surface. On metal surfaces, I’ve found it to be quite resilient, while plastic items may show wear more quickly at points of frequent contact. This performance is comparable to mid-range spray paints and exceeds what you might expect given the price point.
For maximum durability, particularly for outdoor items or pieces that will see heavy use, I recommend applying a clear protective topcoat over the Project Source color. This additional layer helps seal the finish and provides an extra barrier against wear and environmental factors.
Finish Options: Matte, Gloss, or Satin?
The finish of your paint dramatically impacts the final look of your project. Project Source offers several sheen options to suit different aesthetic preferences and practical needs:
Gloss Finish
The high-shine option in the Project Source lineup provides a reflective, light-bouncing surface that adds visual interest and can make colors appear more vibrant. It’s particularly effective for:
- Creating a modern, sleek appearance
- Highlighting intricate details or decorative elements
- Surfaces that benefit from easy cleaning (the smooth surface is less likely to trap dirt)
- Adding visual contrast in spaces with predominantly matte elements
I’ve used their gloss finish most successfully on smaller accent pieces where the reflective quality adds a touch of elegance without overwhelming the space.
Matte Finish
At the opposite end of the spectrum, Project Source’s matte option provides a flat, non-reflective surface that absorbs light rather than reflecting it. This finish works beautifully for:
- Creating a contemporary, sophisticated look
- Concealing surface imperfections (the lack of reflection helps hide dents or uneven areas)
- Achieving a chalk-paint appearance without the specialized application
- Projects where glare reduction is important
My living room wall sconces transformed from dated brass to chic matte black with Project Source spray paint, creating a dramatic improvement for minimal investment.
Satin Finish
Occupying the middle ground, the satin finish offers a subtle sheen without the high reflection of gloss. This versatile option works well for:
- Balancing visual interest with subtlety
- Spaces where a completely flat finish might look too stark
- Items that require occasional cleaning (more cleanable than matte, less showy than gloss)
- Creating a cohesive look across different materials in the same space
The satin black Project Source spray paint has become my standard choice for picture frames, providing a uniform appearance despite the frames’ varying original materials and finishes.
When selecting a finish, consider not only the aesthetic impact but also the practical implications. Higher-gloss finishes tend to be more durable and cleanable but show imperfections more readily, while matte finishes hide flaws but may be more challenging to keep clean over time.
Application Mastery: Getting the Best Results
Even the highest quality paint can disappoint if applied incorrectly. Achieving professional-looking results with Project Source spray paint requires attention to some fundamental techniques.
Preparation: The Foundation of Success
Proper surface preparation is the single most important factor in determining the longevity and appearance of your finished project. For best results with Project Source spray paint:
- Clean thoroughly: Remove all dirt, grease, and residue using an appropriate cleaner for your surface material. For most surfaces, a mixture of mild dish soap and water works well, followed by a clean water rinse and complete drying.
- Sand when necessary: Glossy surfaces benefit from light sanding with fine-grit sandpaper (220-320 grit) to create a slightly roughened surface that helps the paint adhere. After sanding, wipe away all dust with a tack cloth.
- Consider primer: While Project Source can adhere directly to many surfaces, using a primer improves adhesion and coverage, particularly on bare wood, raw metal, or when making dramatic color changes. Project Source offers compatible primers, or you can use other brands designed for your specific material.
- Mask adjacent areas: Use painter’s tape and drop cloths to protect surfaces you don’t want painted. The extra few minutes spent on careful masking can save hours of cleanup.
- Check weather conditions: Ideally, apply spray paint in moderate temperatures (between 50°F and 85°F) with low humidity. Extreme temperatures or high moisture can affect drying time and finish quality.
During a recent bookshelf makeover, I spent nearly as much time on preparation as on actual painting. The results justified the investment—six months later, the finish remains flawless despite daily use.
Application Technique: The Art of the Spray
Once your surface is properly prepared, your application technique will determine the final appearance:
- Shake thoroughly: Project Source cans should be shaken for a full minute before use and periodically during longer painting sessions to ensure proper mixing of the formula.
- Test spray: Always test your spray pattern on cardboard or scrap material before beginning your project to ensure proper flow and familiar yourself with the specific can’s spray pattern.
- Maintain proper distance: Hold the can approximately 8-12 inches from the surface. Too close causes drips and pooling; too far results in a textured, dry appearance.
- Use steady movement: Apply in smooth, even strokes, moving the can at a consistent speed. Start and stop the spray beyond the edges of your project to avoid heavy buildup at the beginning and end of each pass.
- Apply multiple light coats: Rather than trying to achieve full coverage in a single heavy application, build up the finish with several thin coats, allowing appropriate drying time between each. This approach prevents drips and creates a more durable finish.
- Consider the angle: For detailed or hard-to-reach areas, adjust your approach angle rather than contorting your wrist, which can lead to uneven application.
- Mind the overlap: Each spray pass should overlap the previous one by about 30-50% to ensure even coverage without visible lines.
My most successful Project Source applications have involved at least three very light coats rather than attempting to achieve opacity in fewer passes. The patience required is rewarded with a smoother, more professional-looking finish.
Drying Time: The Waiting Game
One consideration when planning your Project Source spray paint project is understanding the drying timeline. The paint passes through several stages as it cures:
- Touch dry: Project Source typically becomes touch dry within 20-30 minutes under ideal conditions. At this stage, the surface no longer feels tacky, but the finish remains vulnerable to damage.
- Handle dry: Most projects can be carefully handled after 1-2 hours, though this varies based on environmental conditions and the thickness of application.
- Recoat window: You can apply additional coats after approximately 30 minutes to 1 hour. Interestingly, if you miss this window, it’s best to wait 24 hours before applying more paint to avoid potential wrinkling or lifting of the previous coat.
- Full cure: While the surface may seem dry, Project Source spray paint continues to harden and develop its ultimate durability for up to 7 days. Avoid placing heavy objects or subjecting the finish to rough handling during this period.
Environmental factors significantly impact these timeframes. High humidity and cooler temperatures extend drying time, sometimes considerably. I once made the mistake of spray painting patio chairs in 90% humidity, and they remained slightly tacky for nearly 48 hours—a lesson in patience and weather awareness!
For projects requiring quick completion, consider using a fan (positioned at a distance to avoid blowing dust onto your wet surface) to circulate air and speed the drying process. Just be careful not to introduce too much dust or debris into the environment.
The Primer Question: Necessary or Optional?
A common point of confusion for many DIYers is whether primer is required before applying spray paint. With Project Source, the answer depends on your specific project circumstances.
When Primer Is Recommended:
- Raw, untreated surfaces like bare wood or metal
- Surfaces with significant color contrast (especially going from dark to light)
- Porous materials that might absorb too much of the color coat
- Previously painted surfaces that show signs of peeling or wear
- Plastic surfaces, which can be notoriously difficult for paint adhesion
- Projects that will face harsh conditions or heavy use
When You Might Skip Primer:
- Previously painted surfaces in good condition, especially when using a similar or darker color
- Non-porous surfaces that are thoroughly cleaned and lightly sanded
- Small decorative items that won’t face significant handling or wear
- Projects where absolute longevity isn’t the primary concern
Project Source offers compatible primers specifically formulated for different surface materials. For maximum adhesion and longevity, their surface-specific primers (metal primer, plastic primer, etc.) provide the best foundation for your color coat.
In my experience, the extra few dollars and minutes invested in primer pay significant dividends in the final result’s appearance and durability. One particularly successful bathroom accessory makeover involved metal toilet paper and towel holders that received a metal primer followed by Project Source metallic gold—three years later, they still look freshly painted despite daily use in a humid environment.
Rust Protection: Fighting the Elements
For metal projects, especially those that will live outdoors, rust protection is a critical consideration. Project Source offers specific formulations designed to inhibit rust formation on metal surfaces.
Their rust-inhibiting formulas contain additives that help seal out moisture and prevent oxidation of the metal beneath. These options typically cost marginally more than the standard formulations but provide significantly improved protection for susceptible items.
For maximum rust protection with Project Source products, follow this system approach:
- Remove any existing rust completely through sanding, wire brushing, or chemical rust removers
- Apply a rust-inhibiting primer specifically designed for metal surfaces
- Apply the Project Source rust-inhibiting spray paint in your chosen color
- Consider a clear protective topcoat for items that will face extreme conditions
I’ve used this approach on everything from garden tools to outdoor light fixtures with excellent results. A set of metal plant stands that previously rusted through every season has maintained its integrity for two years following this treatment protocol with Project Source products.
For items that will face particularly harsh conditions or have high rust potential, consider refreshing the clear protective coat annually as preventative maintenance.
Safety First: Using Spray Paint Responsibly
The convenience of aerosol paint comes with important safety considerations. Project Source spray paint, like all aerosol paints, contains propellants and solvents that require careful handling:
Ventilation
Always use spray paint in well-ventilated areas. Ideally, work outdoors or in a garage with the door open. If working indoors is unavoidable, open multiple windows and use fans to create cross-ventilation.
The fumes from spray paint can cause headaches, dizziness, and respiratory irritation. If you experience any of these symptoms, move to fresh air immediately and allow the painted area to ventilate thoroughly before returning.
Personal Protection
Appropriate protective equipment includes:
- Respirator mask rated for paint fumes (not just a dust mask)
- Eye protection to prevent irritation from airborne particles
- Gloves to avoid skin contact with paint
- Clothes that cover your arms and legs
- Hat or head covering for extensive overhead spraying
I learned the importance of proper eye protection the hard way when a slight breeze changed direction during an outdoor painting session, causing minor but uncomfortable eye irritation that could have been easily prevented.
Environmental Considerations
Dispose of empty cans according to local regulations. Many communities classify empty aerosol cans as hazardous waste that requires special handling.
Never puncture or incinerate spray paint cans, even when empty, as they may retain pressure and flammable propellants.
Be mindful of overspray reaching plants, neighboring properties, or waterways. Position your project to minimize environmental impact and consider using a spray shelter for smaller items.
Storage Safety
Store spray paint cans upright in a cool, dry location away from direct sunlight and heat sources. The temperature range for safe storage is typically between 40°F and 90°F.
Keep spray paint out of reach of children and pets. The combination of pressurized containers and toxic contents presents multiple hazards.
Following these safety guidelines not only protects your health but also helps ensure the best possible results from your Project Source spray paint projects.
Storage and Longevity: Maximizing Shelf Life
Proper storage of partially used cans extends their usability for future projects. After each use:
- Clear the nozzle by turning the can upside down and spraying until only clear propellant emerges (usually 3-5 seconds)
- Wipe the nozzle clean with a paper towel to prevent clogging
- Store the can upright in a temperature-controlled environment
- Note the date of first use on the can with a permanent marker (most spray paint remains effective for 2-3 years after opening if properly stored)
If you encounter a clogged nozzle on a previously used can, try soaking the nozzle in mineral spirits or paint thinner for several minutes, then clean with a thin wire or toothpick. In some cases, removing the nozzle and soaking it separately proves more effective than attempting to clear it while attached to the can.
My workshop includes a dedicated shelf for partially used spray paint cans, organized by color family for easy identification. This system has helped me maintain usable product for touch-ups and small projects without wasting materials.
Project Source vs. Competitors: How Does It Compare?
The spray paint market features options ranging from budget-friendly to premium professional grades. How does Project Source stack up against its competitors?
Compared to Premium Brands (Rust-Oleum, Krylon Professional)
- Price: Project Source typically costs 40-60% less than premium options
- Coverage: Slightly less coverage per can, often requiring an extra coat for comparable opacity
- Color selection: More limited, particularly in specialty finishes and trend colors
- Durability: Generally good but may show wear somewhat sooner than premium alternatives
- Nozzle quality: Functional but not as refined as premium spray systems
Compared to Other Budget Options
- Price: Competitive with other economy brands
- Coverage: Equal or superior to most budget alternatives
- Color accuracy: More consistent than many economy options
- Finish quality: Smoother application with less “spitting” or uneven texture
- Availability: Limited to Lowe’s, whereas some budget brands have wider distribution
In my experience, Project Source occupies a sweet spot between true budget brands and premium options. For most home DIY purposes, it delivers results that approach premium quality at a significantly lower price point.
I’ve found it particularly well-suited for:
- Large projects where material costs could become prohibitive with premium brands
- Experimental or temporary applications where ultimate longevity isn’t critical
- Items that will receive moderate use or limited environmental exposure
- Learning projects for beginners who may make application mistakes
For heirloom-quality restorations or items that will face extreme conditions, premium brands may justify their higher cost through superior longevity. But for the vast majority of home projects, Project Source provides an excellent balance of performance and value.
Conclusion: The Final Verdict
After extensive use across dozens of projects, my assessment of Project Source spray paint is overwhelmingly positive, particularly when considering the price-to-performance ratio. While it may not match the absolute top-tier options in every category, it consistently delivers results that satisfy both aesthetic and practical requirements for most DIY applications.
The brand’s strengths lie in its accessibility, ease of use, and versatility across different surface materials. For homeowners and DIY enthusiasts seeking to transform spaces without breaking the bank, Project Source spray paint represents an excellent balance of quality and affordability that makes creative experimentation possible even on tight budgets.
Whether you’re refreshing outdoor furniture for a new season, updating fixtures to match changing décor trends, or breathing new life into thrift store treasures, Project Source provides a reliable tool in your DIY arsenal. The modest investment required allows for bold color choices and creative risks that might feel too intimidating with more expensive products.
As with any painting product, success ultimately depends on proper preparation, appropriate application techniques, and realistic expectations based on the intended use. When these factors align, Project Source spray paint can deliver results that belie its budget-friendly price point, creating transformations that look anything but economical.
So the next time you’re standing in the spray paint aisle contemplating a creative project, consider giving Project Source a try. Your space—and your wallet—might thank you for it.