
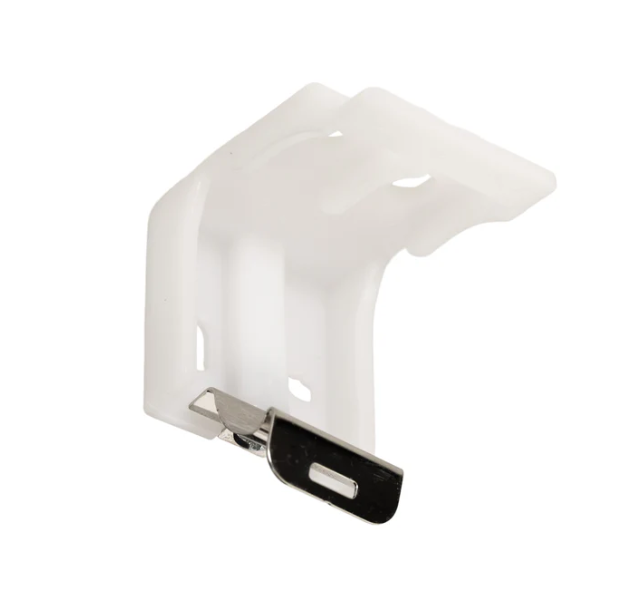
Lowes Project Source Mounting Bracket for Cordless 1″ Mini Blinds
- This hidden mounting bracket is for some cordless 1″ mini blinds sold at Lowes. The label inside the blinds may say that the manufacturer is CF or C.F.
- White plastic and silver metal.
Transform Your Windows with the Perfect Mounting Solution
When it comes to home improvement projects, the smallest details often make the biggest difference. As someone who has installed countless window treatments over the years, I can tell you with absolute certainty that mounting brackets are the unsung heroes of any successful blind installation. Today, I’m diving deep into the world of Project Source blinds mounting brackets – those little pieces of hardware that quite literally hold everything together.
Whether you’re a first-time homeowner, a seasoned DIY enthusiast, or simply looking to replace some worn-out brackets, this comprehensive guide will walk you through everything you need to know about these essential components. From materials and compatibility to installation tips and customer experiences, we’ll cover it all.
So grab your coffee, settle in, and let’s explore the fascinating world of Project Source blinds mounting brackets together. Trust me, by the end of this article, you’ll be looking at those small metal pieces with newfound appreciation!
What Exactly Are Project Source Blinds Mounting Brackets?
Before we dive into the nitty-gritty details, let’s clarify what these brackets actually do. Project Source blinds mounting brackets are specially designed hardware components that secure your window blinds to the wall, ceiling, or window frame. They serve as the crucial connection point between your window treatment and your home’s structure.
These brackets are not just random pieces of metal – they’re engineered specifically for Project Source blinds, ensuring proper fit, function, and aesthetic appeal. Think of them as the foundation of your window treatment system. Without quality brackets properly installed, even the most expensive blinds will sag, hang unevenly, or potentially fall altogether.
Project Source, a brand available primarily through Lowe’s home improvement stores, has developed these brackets to complement their line of window blinds. They’re designed with the average homeowner in mind – balancing durability, ease of installation, and affordability.
Where to Purchase Project Source Blinds Mounting Brackets
When you’re on the hunt for Project Source blinds mounting brackets, your primary destination should be Lowe’s home improvement stores. As the main retailer for the Project Source brand, Lowe’s carries the complete line of brackets designed to fit Project Source window treatments.
You can find these brackets in the window treatment section of your local Lowe’s store, typically near the blinds and shades. The brackets are often organized by blind type and size, making it relatively easy to locate the specific brackets that match your Project Source blinds.
If visiting a physical store isn’t convenient, Lowe’s online platform offers the same selection of Project Source brackets with the added benefit of home delivery. The website provides detailed product descriptions, specifications, and sometimes customer reviews to help guide your purchase decision.
Beyond Lowe’s, you might occasionally find Project Source brackets through online marketplaces like Amazon, eBay, or specialty window treatment websites. However, availability through these channels can be inconsistent, and there’s always the risk of counterfeit products. For guaranteed authenticity and compatibility, purchasing directly from Lowe’s is generally the safest bet.
Cost Considerations: What to Expect
One of the most common questions about Project Source blinds mounting brackets concerns their cost. While prices can vary based on specific bracket type, material, and your location, Project Source brackets are positioned as a budget-friendly option in the market.
Basic Project Source mounting brackets typically range from $2 to $8 per pair, making them an economical choice compared to some premium brands that can cost upwards of $15-20 for similar hardware. This affordability is one of the key selling points of the Project Source line.
For specialty brackets – such as those designed for extremely wide blinds or decorative valances – you might see prices slightly higher, typically in the $8-12 range. Even at the upper end of the price spectrum, Project Source maintains its reputation for providing good value.
It’s worth noting that replacement brackets are often sold individually rather than in pairs, so be sure to check whether the listed price is for a single bracket or a set. Most standard window installations require two brackets (one for each side), while wider blinds might require additional center support brackets.
If you’re working on multiple windows throughout your home, these costs can add up quickly. However, compared to the price of the blinds themselves, brackets represent a relatively small investment in ensuring your window treatments function properly for years to come.
Compatibility: Will They Work With Your Blinds?
Project Source brackets are specifically designed to work seamlessly with Project Source blinds, creating an integrated system where all components fit together perfectly. However, this doesn’t necessarily mean they won’t work with other brands – it just requires some careful consideration.
If you’re matching Project Source brackets with Project Source blinds, compatibility is straightforward. The packaging typically indicates which blind models the brackets are designed for, categorized by type (venetian, roller, cellular, etc.) and sometimes by size range.
For those looking to use Project Source brackets with other blind brands, you’ll need to examine the mounting mechanism carefully. Many standard venetian and horizontal blinds use similar mounting systems across brands, meaning Project Source brackets might work with blinds from Hunter Douglas, Levolor, or other manufacturers. The key factors to check include:
- The headrail width and depth
- The mounting mechanism (box bracket, clip-in, slide-in, etc.)
- Weight capacity compared to your blinds’ weight
Vertical blinds, specialty shades, and custom window treatments often have more proprietary mounting systems, making cross-brand compatibility less likely. In these cases, it’s best to stick with the brackets specifically designed for your blinds.
When in doubt, taking your existing headrail or an old bracket to Lowe’s for comparison can save you the hassle of purchasing incompatible hardware. Many experienced associates in the window treatment department can help determine if Project Source brackets will work with your specific blinds.
Material Matters: What Are They Made Of?
The materials used in Project Source blinds mounting brackets play a significant role in their durability, appearance, and installation requirements. Understanding these materials can help you make an informed decision about whether they’re right for your specific needs.
Most Project Source mounting brackets are constructed from one of three primary materials:
Metal Brackets
The most common Project Source brackets are made from stamped steel or aluminum. These metal brackets offer excellent strength-to-weight ratios and can support most standard blind sizes without issue. The metal is typically finished with either:
- White powder coating (to match white blinds and trim)
- Neutral metallic finishes (brushed nickel, bronze, etc.)
- Painted finishes in various colors to match blind headrails
The metal construction provides good rigidity and longevity, though the quality of the finish can impact rust resistance, particularly in humid environments like bathrooms or coastal homes.
Plastic Brackets
For lighter-weight blinds and in some budget models, Project Source offers plastic mounting brackets. These are usually made from reinforced polymers designed to provide adequate support while reducing costs.
Plastic brackets have several advantages: they’re lightweight, won’t rust, and sometimes feature a softer profile that can be less obtrusive when visible. However, they generally can’t support as much weight as their metal counterparts and may be more prone to cracking over time, especially if exposed to direct sunlight or temperature fluctuations.
Composite Brackets
Some specialty Project Source brackets feature composite construction, combining metal structural elements with plastic covering components. These hybrids aim to balance strength, appearance, and cost.
The material choice impacts not just durability but also installation. Metal brackets typically require pre-drilling to prevent splitting in wood window frames, while plastic brackets sometimes can be installed without pre-drilling in softer woods.
Inside vs. Outside Mount: Do They Work for Both?
One of the most important considerations when selecting mounting brackets is whether you plan to install your blinds with an inside mount (within the window frame) or an outside mount (on the wall or trim surrounding the window). The good news is that Project Source offers brackets designed for both mounting styles.
Inside Mount Brackets
Project Source inside mount brackets are designed to be installed within the window recess, creating a clean, built-in look. These brackets typically have a low profile to minimize their visibility and maximize the space available for the blind mechanism.
For inside mounts, you’ll need to carefully measure the depth of your window recess to ensure there’s sufficient space for both the brackets and the blinds. Project Source brackets usually require at least 1.5 to 2 inches of depth, though this varies by blind type.
Outside Mount Brackets
Outside mount brackets attach to the wall, window trim, or ceiling above the window. This mounting style works well for windows with minimal recess depth, windows with obstructions like cranks or handles, or when you want the blinds to cover the entire window frame.
Project Source outside mount brackets often include spacers or extenders to position the blinds at an appropriate distance from the mounting surface, preventing interference with window handles or decorative trim.
Many Project Source bracket sets are versatile enough to work for either inside or outside mounting, with adjustable positions or reversible designs. This flexibility makes them particularly useful for homes with a mixture of window styles requiring different mounting approaches.
Installation Guide: Step by Step
Installing Project Source blinds mounting brackets doesn’t require professional expertise, but following the correct process ensures your blinds will hang properly and operate smoothly. Here’s a comprehensive guide to installing these brackets like a pro:
Before You Begin
- Gather all necessary tools (typically a pencil, measuring tape, level, drill, and screwdriver)
- Unpack and identify all components in your bracket kit
- Read the manufacturer’s instructions specific to your bracket model
- Decide on inside or outside mounting based on your window configuration
For Inside Mount Installation
- Measure and mark the position for each bracket, ensuring they’re at equal heights
- Check measurements with a level to ensure brackets will be perfectly horizontal
- If the brackets have multiple mounting holes, mark at least two per bracket
- Pre-drill holes using a drill bit slightly smaller than your mounting screws
- Align the bracket with your pre-drilled holes
- Secure the bracket using the provided screws, being careful not to overtighten
- Repeat for the second bracket on the opposite side of the window
- For wider blinds, install any required center support brackets following the same process
For Outside Mount Installation
- Determine the desired height for your blinds
- Mark the position for each bracket, ensuring they extend far enough to clear any obstacles
- Use a level to ensure your markings are perfectly horizontal
- Pre-drill holes into the wall, trim, or ceiling
- If mounting into drywall without a stud, install appropriate anchors
- Align the bracket and secure with provided screws
- Repeat for all remaining brackets
Final Steps
- Double-check that all brackets are secure and properly aligned
- Install the blind headrail according to manufacturer instructions, typically by:
- Positioning the front of the headrail into the front lip of the brackets
- Rotating the back of the headrail upward until it clicks into place
- Closing any locking mechanisms on the brackets
- Test the operation of the blinds to ensure smooth functioning
Remember that specific installation details may vary slightly depending on your particular Project Source blind model and bracket type. Always refer to the included installation guide for model-specific instructions.
Essential Tools for Installation
To successfully install Project Source blinds mounting brackets, you’ll need a basic set of tools. Having these on hand before you begin will make the installation process much smoother:
Must-Have Tools
- Measuring tape: For precise positioning of brackets
- Pencil: To mark mounting locations
- Level: To ensure brackets are perfectly horizontal
- Drill with various bits: For creating pilot holes in different surfaces
- Screwdriver: Phillips or flathead, depending on the screws provided
- Step ladder: To safely reach higher windows
Optional but Helpful Tools
- Stud finder: To locate wall studs for more secure mounting
- Center punch: To create a small indentation preventing drill bits from slipping
- Hammer: For installing wall anchors if mounting to drywall
- Tape: Painter’s tape can be useful for temporarily marking positions
- Vacuum or drop cloth: For easy cleanup of drilling dust
Safety Equipment
- Safety glasses: To protect your eyes during drilling
- Work gloves: To prevent cuts from sharp bracket edges
The good news is that Project Source brackets don’t require specialized tools that the average homeowner wouldn’t already have or could easily borrow. This accessibility aligns with the brand’s overall approach of creating products that are DIY-friendly and approachable for non-professionals.
If you’re planning to install blinds in multiple windows, investing in quality tools makes sense as they’ll serve you well beyond this single project. However, for a one-time installation, basic tools from a home toolkit are generally sufficient.
Hardware Included: What Comes in the Box?
When purchasing Project Source blinds mounting brackets, it’s important to know exactly what hardware is included and what you might need to supply yourself. This knowledge prevents frustrating mid-project trips to the hardware store.
Typically Included with Project Source Brackets
- The mounting brackets themselves (usually two for standard windows)
- Installation screws appropriate for wood or drywall mounting
- Any bracket-specific components like locking mechanisms or spacers
- Basic installation instructions
Sometimes Included (Varies by Model)
- Center support brackets for wider blinds
- Drywall anchors for more secure installation
- Extension brackets for outside mounts that need additional clearance
- Decorative covers to conceal bracket mechanisms
Usually Not Included (You May Need to Supply)
- Specialized anchors for concrete, brick, or metal surfaces
- Longer screws for mounting through thick trim or with spacers
- Special drill bits for masonry or metal surfaces
- Child safety devices (though these often come with the blinds themselves)
The exact contents vary by bracket model and sometimes by package size (single brackets vs. pairs or sets). The packaging typically lists all included components, but it’s always wise to open and inventory the contents before beginning your installation.
If you’re mounting to surfaces other than wood or drywall, you’ll likely need to purchase appropriate fasteners separately. For example, mounting to tile, concrete, or metal requires specialized anchors designed for those materials.
One notable convenience of Project Source products is that the brackets and blinds are designed as a system, so when purchased together, you typically receive all the hardware necessary for standard installations. This system approach simplifies the purchasing process and reduces compatibility concerns.
Adjustability Features: Flexibility When You Need It
A frequently overlooked aspect of mounting brackets is their adjustability – the ability to fine-tune position, angle, or projection. Project Source brackets offer varying degrees of adjustability depending on the model and intended use.
Common Adjustability Features
- Depth Adjustment: Some brackets allow the headrail to be positioned at different depths within the bracket, useful for clearing obstacles or adjusting light gaps.
- Projection Adjustment: Brackets for outside mounts sometimes feature adjustable projection, letting you position the blinds at various distances from the mounting surface.
- Multi-Position Mounting Holes: Many Project Source brackets include multiple mounting hole options, allowing flexibility in where exactly you attach the bracket to your window frame.
- Tension Adjustment: Some brackets include tension screws that can be tightened or loosened to adjust how firmly the blind headrail is held.
- Reversible Design: Certain brackets can be flipped or rotated to accommodate different mounting scenarios, effectively giving you two bracket types in one.
The level of adjustability varies significantly across the Project Source lineup. Basic models typically offer minimal adjustment options, focusing instead on simplicity and cost-effectiveness. Mid-range and specialty brackets tend to incorporate more adjustability features to accommodate challenging installation scenarios.
This adjustability can be particularly valuable in older homes where windows may not be perfectly square or standard sized. The ability to make minor adjustments after installation can be the difference between blinds that look custom-fitted and those that appear obviously misaligned.
When selecting Project Source brackets, consider what adjustability features might benefit your specific installation. If you have unusual windows or anticipate needing flexibility, it may be worth investing in brackets with more adjustment options, even if they cost slightly more.
Dimensions and Specifications: Size Matters
Understanding the dimensions of Project Source blinds mounting brackets is crucial for planning your installation and ensuring compatibility with your specific blinds. While dimensions vary across the product line, there are some general specifications to be aware of.
Typical Dimensional Considerations
- Bracket Width: Usually ranges from 1.5 to 2.5 inches, depending on the model
- Bracket Height: Typically 1 to 2 inches for standard brackets
- Bracket Depth: Generally 0.75 to 1.5 inches, critical for inside mount installations
- Mounting Hole Pattern: Varies by model, but typically features at least two mounting holes spaced 0.5 to 1 inch apart
- Weight Capacity: Ranges from 5 pounds for light-duty plastic brackets to 15+ pounds for heavy-duty metal versions
Important Measurements to Consider
- Required Mounting Surface: The minimum flat surface area needed to securely attach the bracket
- Headrail Compatibility: The internal dimensions of the bracket that must match your blind’s headrail
- Projection Distance: For outside mounts, how far the bracket positions the blind from the mounting surface
- Clearance Requirements: The space needed around the bracket for proper blind operation
Project Source typically provides detailed dimensional specifications on the product packaging or in the installation guide. These specifications are particularly important when:
- Installing blinds in shallow window recesses
- Mounting around obstacles like window cranks or handles
- Retrofitting new brackets to existing blinds
- Installing in tight spaces with minimal clearance
If you’re replacing existing brackets or need to match specific dimensions, it’s advisable to bring your old bracket to the store for comparison. Even small variations in size can affect the fit and function of your blinds.
For particularly wide windows, pay attention to the maximum span recommendations. Windows exceeding certain widths (typically around 48 inches for Project Source blinds) require additional center support brackets to prevent sagging and ensure smooth operation.
Weight Capacity: Can They Handle Heavy Blinds?
An essential consideration when selecting mounting brackets is whether they can adequately support the weight of your blinds. Project Source offers brackets with varying weight capacities to accommodate different blind types and sizes.
Standard Project Source mounting brackets are designed to support the weight of typical residential blinds, which generally fall in the range of 3 to 8 pounds per window. However, the exact weight capacity depends on several factors:
Factors Affecting Weight Capacity
- Bracket Material: Metal brackets typically offer higher weight capacity than plastic ones
- Mounting Surface: Brackets secured to solid wood can support more weight than those mounted to drywall
- Number of Mounting Screws: Brackets with multiple mounting points distribute weight better
- Quality of Installation: Properly installed brackets with appropriate anchors have higher effective capacity
- Bracket Design: Some designs are engineered specifically for heavier applications
Weight Guidelines by Blind Type
- Aluminum Mini Blinds: Typically lightweight (2-5 pounds), standard brackets usually sufficient
- Vinyl Horizontal Blinds: Medium weight (4-8 pounds), standard brackets appropriate
- Wooden Blinds: Heavier (8-15 pounds), may require heavy-duty brackets or additional support
- Cellular/Honeycomb Shades: Generally lightweight (2-6 pounds)
- Roman Shades: Weight varies greatly (4-12 pounds) depending on fabric and size
- Vertical Blinds: Often require specialized brackets designed specifically for vertical track systems
For particularly heavy blinds or extra-wide windows, Project Source offers heavy-duty brackets and center support brackets designed to distribute weight more effectively. These specialized brackets are essential for preventing sagging, headrail bending, or complete mounting failure.
When in doubt about weight capacity, it’s always better to choose brackets rated for more weight than you think you’ll need. The small additional cost of upgraded brackets is insignificant compared to the potential damage and hassle of blinds pulling away from your wall.
Most Project Source bracket packaging indicates maximum recommended weight capacity, but if this information isn’t clearly stated, consulting with a Lowe’s associate can help ensure you select brackets appropriate for your specific blinds.
Replacement Options: When You Need New Brackets
Even the most durable brackets may eventually need replacement due to damage, wear, or when updating your window treatments. Fortunately, Project Source offers several options for replacing mounting brackets.
When to Replace Your Brackets
- When plastic components have cracked or broken
- If metal brackets show significant rust or corrosion
- When moving blinds to different windows with different mounting requirements
- If you notice blinds becoming loose or unstable
- When upgrading to heavier or different style blinds
Finding the Right Replacements
Project Source replacement brackets can be purchased individually or in pairs, making it economical to replace just what you need. To ensure you get the correct replacements:
- Identify Your Blind Model: Check any documentation that came with your original blinds or look for model numbers on the headrail
- Bring an Existing Bracket: If possible, take an existing bracket to Lowe’s for direct comparison
- Measure Carefully: Note the exact dimensions of your current brackets and headrail
- Consider Upgrades: Replacement might be an opportunity to upgrade to better quality brackets
Compatibility Considerations
When the exact Project Source replacement isn’t available, compatible alternatives may work. Many standard Project Source blinds use industry-standard mounting systems that are interchangeable with other brands like Levolor or Allen + Roth (another Lowe’s house brand).
If you’re replacing very old brackets, be aware that mounting standards have evolved over time. Newer brackets might require minor modifications to your installation approach, such as new mounting holes or slight positioning adjustments.
For discontinued models, universal replacement brackets are sometimes an option. These adaptable brackets are designed to work with a wide range of blind types and can often be adjusted to fit your specific headrail dimensions.
The availability of replacement parts is one advantage of choosing a widely distributed brand like Project Source. As a house brand for Lowe’s, replacement components tend to remain available longer than for some specialty or boutique blind manufacturers.
Universal Design: One Size Fits All?
While the term “universal” is sometimes used in marketing mounting brackets, the reality is more nuanced. Project Source offers several bracket designs that accommodate multiple blind types, but truly universal brackets that fit every possible window treatment don’t exist.
The Truth About “Universal” Brackets
Project Source does offer versatile brackets designed to work with multiple blind types within their product line. These adaptable brackets typically feature:
- Adjustable mounting positions
- Compatible dimensions for several headrail styles
- Multiple installation configurations
- Standardized screw patterns
However, even these versatile brackets have limitations. They’re primarily designed to work within the Project Source ecosystem and with standard window treatment types like horizontal blinds and cellular shades.
When Universal Brackets Work Well
- When replacing brackets for common Project Source blind styles
- For standard-sized windows with typical mounting requirements
- When switching between similar blind types (e.g., from aluminum mini blinds to vinyl blinds)
- In rental properties where flexibility is valuable
When Specialized Brackets Are Better
- For specialty window treatments like vertical blinds or Roman shades
- With very heavy wooden blinds or wide windows
- For decorative valances or cornices
- When mounting to unusual surfaces or in challenging locations
The appeal of universal brackets is understandable – they offer flexibility and potentially reduce the need to purchase different brackets for each window treatment. However, they sometimes represent a compromise in terms of optimal fit and performance.
If you’re working with standard window treatments in typical installation scenarios, Project Source’s versatile bracket options likely provide sufficient adaptability. For more specialized applications, investing in brackets specifically designed for your exact blind type generally yields better results.
Rust Resistance: Built to Last?
In environments like bathrooms, kitchens, or coastal homes, rust resistance becomes a critical factor in bracket longevity. Project Source addresses this concern with various finishes and materials designed to withstand moisture exposure.
Rust-Resistant Features
Most metal Project Source brackets feature protective finishes to prevent corrosion:
- Powder Coating: Many white and colored brackets use powder coating, which provides a durable barrier against moisture
- Galvanized Treatments: Some metal components receive galvanization to resist rust
- Paint Finishes: Specialized paint formulations offer additional protection
- Polymer Options: For maximum moisture resistance, some models utilize corrosion-proof plastics
The level of rust resistance varies across the Project Source line. Premium brackets typically offer better moisture protection than basic models, reflecting their higher price point and intended use in challenging environments.
Environmental Considerations
Different environments place varying demands on rust resistance:
- Bathrooms: High humidity and direct water exposure demand excellent rust resistance
- Kitchens: Steam, cooking splatter, and cleaning chemicals create challenging conditions
- Coastal Areas: Salt air is particularly corrosive to metal components
- Indoor Pools or Saunas: Extreme humidity requires maximum protection
Maintenance for Longevity
Even with rust-resistant features, proper maintenance extends bracket lifespan:
- Periodically wipe brackets with a dry cloth to remove moisture
- Address any paint chips promptly to prevent corrosion from starting
- In high-humidity areas, consider applying a clear protective spray to provide additional protection
- Ensure proper ventilation in humid rooms to reduce moisture exposure
For applications where rust resistance is paramount, consider Project Source’s plastic bracket options. While they may not offer the same structural strength as metal brackets, their complete immunity to rust makes them ideal for high-moisture environments where corrosion is a significant concern.
Vertical Blind Compatibility: Special Considerations
Vertical blinds require different mounting approaches than horizontal blinds, raising questions about whether Project Source brackets can accommodate these systems. The answer depends on the specific vertical blind system you’re working with.
Project Source Vertical Blind Brackets
Project Source does offer brackets specifically designed for their vertical blind systems. These specialized brackets differ significantly from those used for horizontal blinds:
- They’re designed to support a track system rather than a headrail
- The mounting mechanism accommodates the rotational movement of vertical vanes
- They typically feature different dimensions and mounting patterns
- Some include valance clips for decorative top treatments
Compatibility Limitations
Standard Project Source horizontal blind brackets are not compatible with vertical blind systems due to fundamental differences in how these window treatments operate. Attempting to use horizontal brackets for vertical blinds will result in improper installation and potential failure.
Even within vertical blind systems, brackets are often specific to particular track styles. Project Source vertical blind brackets are primarily designed to work with Project Source vertical blinds and may not be compatible with other brands or older vertical blind systems.
Installation Differences
Installing vertical blind brackets involves some unique considerations:
- Extended Projection: Vertical brackets often need to position the track further from the wall to allow space for the rotating vanes
- Precise Alignment: Proper operation of vertical blinds depends on perfectly level track installation
- Weight Distribution: The weight of vertical blinds is distributed differently than horizontal blinds
- Valance Support: Many vertical systems include a decorative valance requiring additional support
If you’re replacing brackets for an existing Project Source vertical blind system, it’s essential to match the exact bracket model to ensure proper fit and function. Taking the old bracket to Lowe’s for comparison is the most reliable approach.
For new vertical blind installations, purchasing a complete Project Source system (including the appropriate brackets) ensures all components are designed to work together and simplifies the installation process.
Installation Guides: Learning the Ropes
Clear installation instructions can make the difference between a smooth DIY project and a frustrating experience. Project Source recognizes this and provides various resources to guide you through the bracket installation process.
Standard Documentation
Project Source blinds mounting brackets typically come with printed installation instructions that include:
- Detailed diagrams showing bracket positioning
- Step-by-step installation procedures
- Lists of required tools and included hardware
- Troubleshooting tips for common installation challenges
- Contact information for customer support
The quality and comprehensiveness of these instructions vary across the Project Source line. Premium brackets generally include more detailed guidance, while basic models may come with simplified instructions assuming some prior DIY experience.
Additional Resources
Beyond the included documentation, several resources can help with installation:
- Lowe’s Website: Often features expanded installation guides and sometimes video tutorials
- In-Store Assistance: Lowe’s associates in the window treatment department can provide guidance
- Project Source Customer Service: Available for telephone support during business hours
- Online Communities: DIY forums and social media groups offer peer support and advice
- YouTube Tutorials: Many helpful videos demonstrate Project Source bracket installation
Common Installation Challenges
The installation guides address several frequently encountered challenges:
- Mounting to different surface materials (drywall, wood, tile)
- Dealing with obstacles like window cranks or handles
- Ensuring proper alignment for smooth blind operation
- Determining appropriate spacing for center support brackets
- Troubleshooting issues like tilting headrails or uneven blinds
For those uncomfortable with DIY installation despite the available guidance, Lowe’s often offers professional installation services for an additional fee. This service includes proper bracket mounting and complete blind installation, ideal for those who prefer to leave the work to professionals.
Keeping the installation guide after completing your project is recommended, as it may contain valuable information for future maintenance or if you need to contact customer service regarding warranty issues.
Durability: The Test of Time
Investing in window treatments isn’t just about immediate appearance – durability determines whether your installation will stand the test of time. Project Source blinds mounting brackets offer varying levels of durability depending on construction, materials, and intended use.
Durability Factors
Several key factors influence how long Project Source brackets will last:
- Material Quality: Metal brackets typically outlast plastic ones, with steel and aluminum offering the best longevity
- Finish Protection: The quality of powder coating or paint affects resistance to chipping and scratching
- Mechanical Design: Brackets with fewer moving parts generally last longer
- Installation Quality: Properly installed brackets with appropriate screws and anchors remain secure longer
- Environmental Conditions: Exposure to sunlight, humidity, and temperature fluctuations impacts lifespan
Expected Lifespan
Under normal residential conditions with proper installation:
- Premium Metal Brackets: 10-15+ years
- Standard Metal Brackets: 7-10 years
- Plastic Brackets: 5-7 years in optimal conditions, less in high-stress applications
These estimates assume average use with standard-weight blinds. Heavier blinds, frequent adjustment, or challenging environments may reduce expected lifespan.
Signs of Wear
Monitoring for these indicators helps identify when replacement might be necessary:
- Visible cracks in plastic components
- Rusting or corrosion on metal surfaces
- Loosening of the bracket from the mounting surface
- Difficulty engaging locking mechanisms
- Visible bending or deformation under the blind’s weight
Maximizing Durability
Several practices can extend the life of your Project Source brackets:
- Choose brackets rated for more weight than your blinds actually require
- Use all provided mounting screws and appropriate anchors
- Clean brackets periodically to prevent dirt buildup in mechanisms
- Operate blinds gently, avoiding yanking or pulling on the headrail
- Address any issues promptly before they worsen
While Project Source brackets are designed as a more economical option compared to premium brands, they can provide satisfactory durability when properly selected and installed. For applications where maximum longevity is critical, investing in their higher-end bracket options typically yields better long-term results.
Brand Comparison: How Do They Stack Up?
When evaluating Project Source blinds mounting brackets, it’s helpful to understand how they compare to other brands on the market. This context allows you to make an informed decision based on your specific needs and budget.
Project Source vs. National Brands
Compared to well-known national brands like Levolor, Hunter Douglas, or Bali:
- Price Point: Project Source brackets are typically 20-40% less expensive
- Material Quality: Generally good but may use slightly thinner metals or simpler polymers
- Design Innovation: Fewer proprietary features or patented mechanisms
- Warranty Coverage: Usually shorter warranty periods (1-3 years vs. 5+ years)
- Availability: Limited to Lowe’s vs. wider distribution of national brands
Project Source vs. Other House Brands
Compared to other retailer house brands like Allen + Roth (Lowe’s), Better Homes & Gardens (Walmart), or Home Decorators Collection (Home Depot):
- Compatibility: Similar standardization within their own product ecosystems
- Price Range: Comparable pricing strategies as entry to mid-level options
- Design Aesthetic: Project Source tends toward functional simplicity rather than decorative emphasis
- Material Selection: Comparable materials and construction methods
- Customer Support: Similar retailer-backed support systems
Value Proposition
Project Source positions itself as a value-oriented brand offering reasonable quality at accessible price points. The brackets reflect this philosophy with:
- Functional designs that prioritize reliability over premium features
- Standardized components that work within their product family
- Adequate but not exceptional materials and finishes
- DIY-friendly installation with minimal specialized tools required
- Sufficient durability for typical residential applications
For many homeowners, Project Source brackets represent a sensible middle ground – better quality than the cheapest generic options but more affordable than premium brands. This positioning makes them particularly suitable for rental properties, starter homes, or secondary spaces where top-tier durability isn’t the primary concern.
When selecting between Project Source and competitors, consider your specific needs. If budget is a primary concern or you’re outfitting multiple windows, the cost savings of Project Source can be significant. For showcase windows or challenging installations where premium features would provide tangible benefits, investing in higher-end brackets might be justified.
Customer Experiences: The Real-World Test
Perhaps the most telling indicator of Project Source blinds mounting brackets’ quality comes from the experiences of actual customers who have installed and lived with them. Customer reviews and feedback reveal both strengths and limitations.
What Customers Appreciate
Based on reviews and feedback, customers consistently praise several aspects of Project Source brackets:
- Value for Money: Many reviewers mention satisfaction with the quality relative to the affordable price point
- Ease of Installation: DIY-friendly design with straightforward instructions receives frequent positive mentions
- Availability: The convenience of finding replacement parts at local Lowe’s stores is a significant advantage
- Compatibility: Good integration with Project Source blinds creates a hassle-free system
- Adequate Strength: For typical residential applications, the brackets provide sufficient support
Common Criticisms
Customer feedback also highlights some recurring concerns:
- Plastic Components: Some reviewers note disappointment with the durability of plastic parts in certain bracket models
- Finish Quality: Occasional reports of paint chipping or uneven finishes
- Limited Adjustability: Some users wish for more fine-tuning options, particularly with challenging windows
- Documentation Clarity: Instructions sometimes described as unclear or assuming too much prior knowledge
- Consistency Issues: Quality control variations between different production batches
Real-World Performance
In everyday use, most customers report that Project Source brackets perform reliably for standard window treatments. The brackets seem to excel in straightforward installations with average-weight blinds in typical residential settings.
Customer experiences suggest that satisfaction levels are highest when the brackets are used as intended – with matching Project Source blinds in standard installation scenarios. Satisfaction tends to decrease when pushing the brackets beyond their intended use, such as with extremely heavy blinds or in challenging mounting situations.
For specialty applications or premium window treatments, customer feedback indicates that investing in higher-end brackets might be worthwhile. However, for basic to mid-range blinds in normal conditions, the majority of customers find Project Source brackets to provide satisfactory performance at an attractive price point.
Conclusion: Making the Right Choice
After this comprehensive exploration of Project Source blinds mounting brackets, it’s clear that these humble hardware components play a crucial role in the success of your window treatment installation. From materials and compatibility to installation techniques and long-term durability, every aspect contributes to your overall satisfaction.
Project Source brackets represent a practical solution for many homeowners – balancing affordability, adequate quality, and wide availability through Lowe’s retail network. While they may not offer the premium features or extended warranties of high-end brands, they provide reliable performance for typical residential applications at a price point that makes refreshing multiple windows accessible.
When selecting mounting brackets for your window treatments, remember to consider:
- The specific requirements of your blinds (type, weight, dimensions)
- Your mounting surface and installation scenario
- Environmental factors like humidity and sun exposure
- Your budget and value expectations
- Your DIY comfort level and available tools
For most standard installations with Project Source blinds, the matching brackets provide the simplest and most reliable solution. The integrated system approach ensures compatibility and streamlines the installation process.
Whether you’re tackling a whole-home window treatment project or simply replacing a broken bracket, understanding the nuances of these essential components empowers you to make informed decisions. With proper selection and installation, those small pieces of metal or plastic will quietly perform their vital function for years to come, supporting your blinds and enhancing your home’s comfort and appearance.
The next time you raise or lower your blinds, take a moment to appreciate those unsung heroes hiding just out of sight – the mounting brackets that make it all possible!